
Feb 2011:
Background:
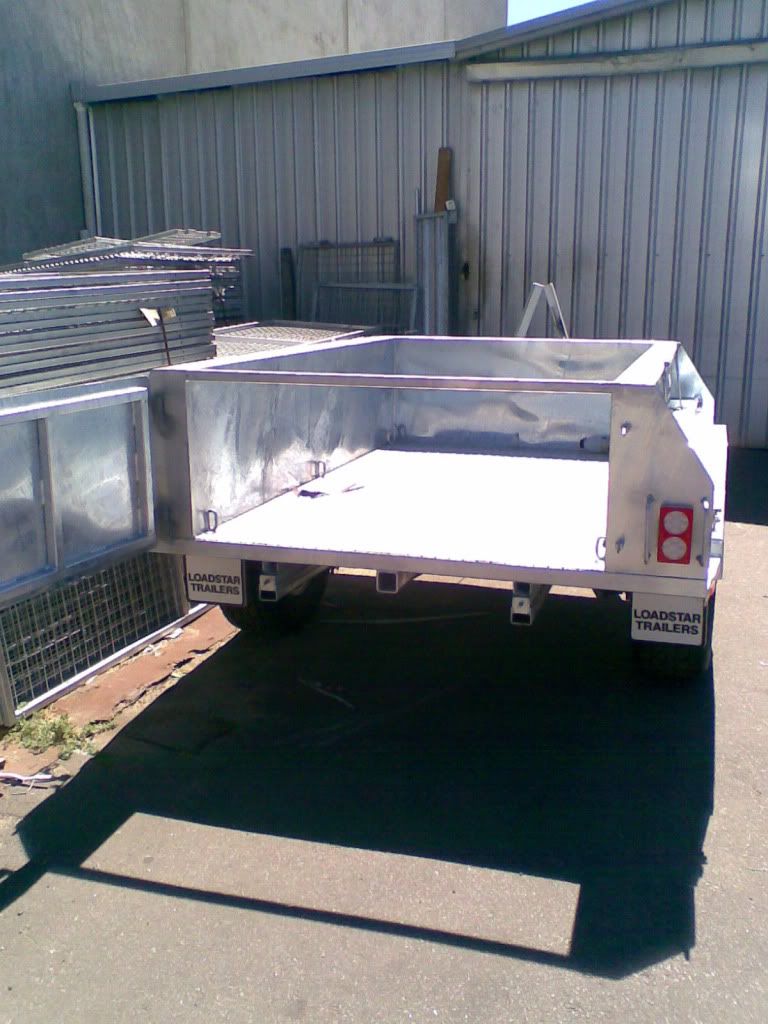
To have a custom off road trailer built to stand the test of touring the outback (time will tell) for a reasonable spend.
It has to accommodate my family, be both relatively simple and fun to use and to be comfortable to live in/from. Easy to tow and able to handle all but the very hard/extreme off road stuff.
The detail (top to bottom):
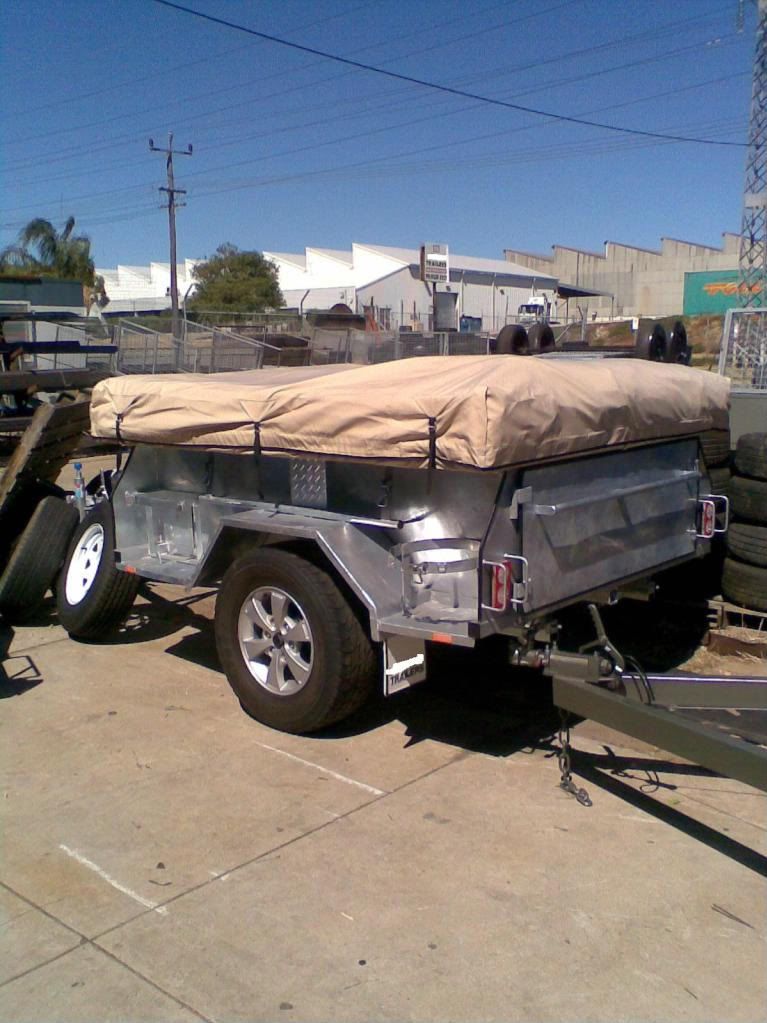
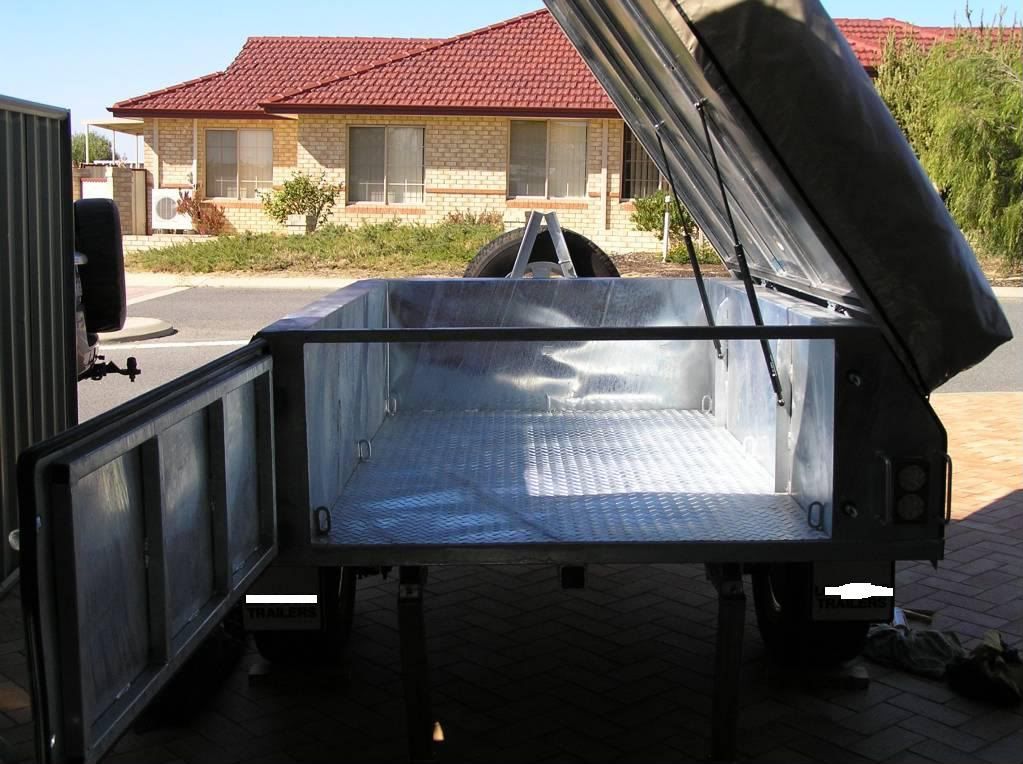
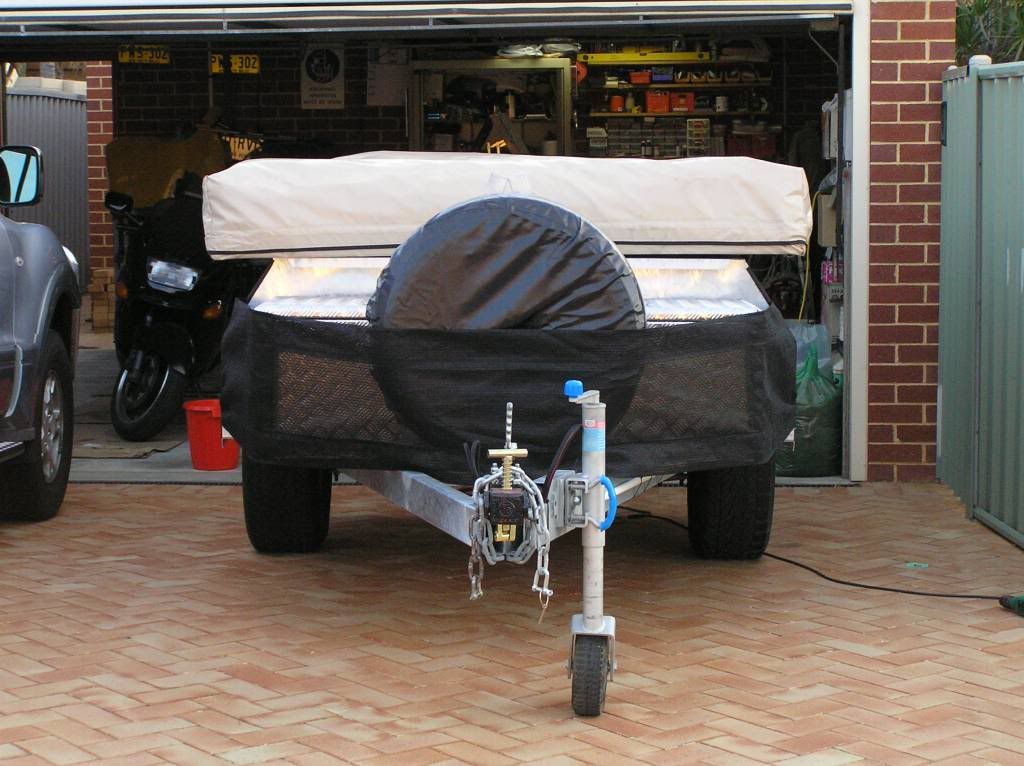
Imported canvas, large 24SqM tent top, gas strutted lift up
No paint/powdercoat. To be fully hot dipped galvanised
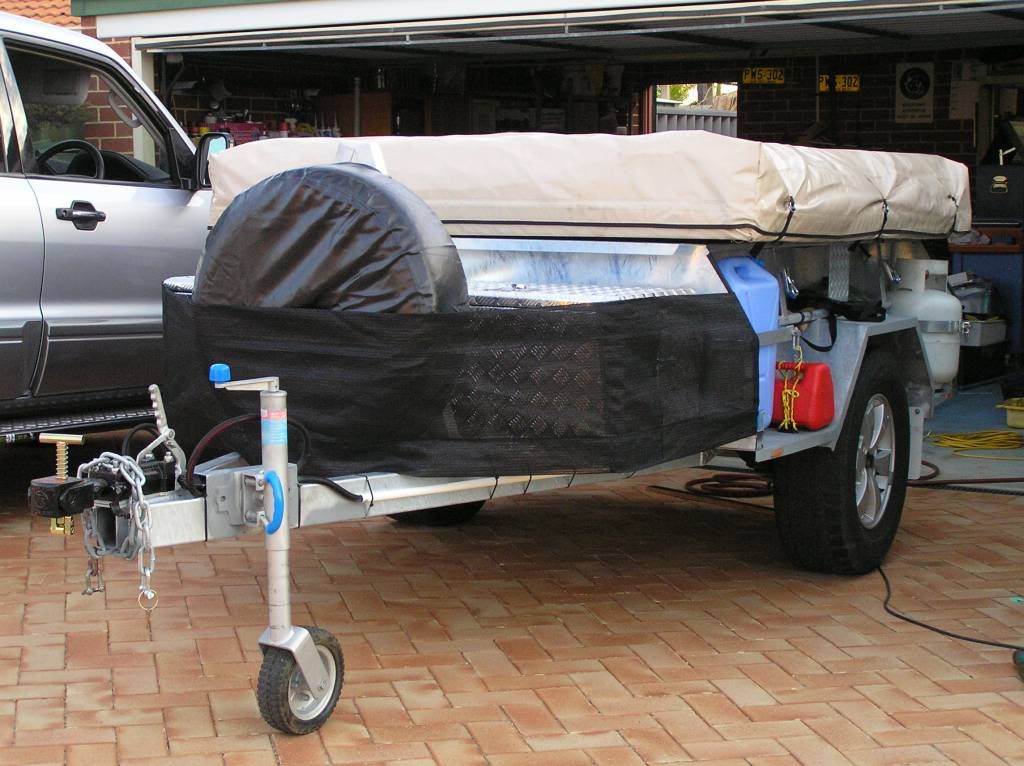
2 x jerry holders, 2 x gas holders (1x9kg, 1x4.5 - backup unit)
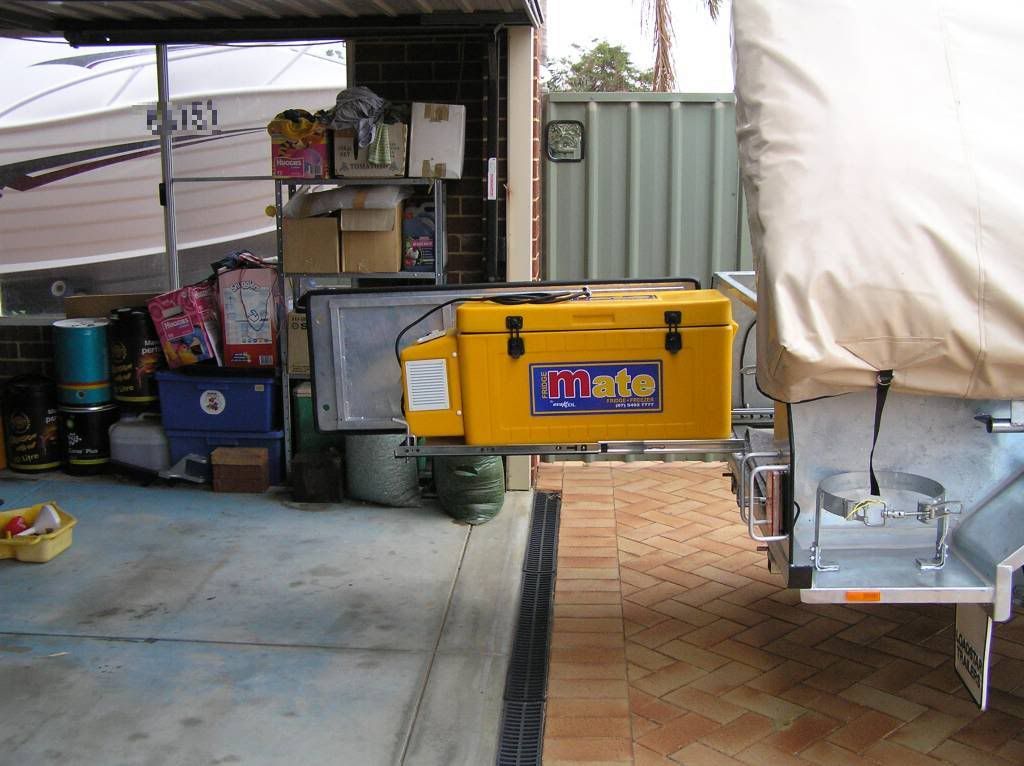
extended drawbar to fit large toolbox and upright spare wheel
1.4T axle, mechanical over ride brakes, trigg poly block hitch
7 leaf eye/eye off road springs with rebound spring
hubs modded to suit standard 16" Paj alloys, trailer built to suit these wheels
Tie down points welded to floor
RHS sub frame
Reece type hitch at the rear
The bits for me to do:
fit toolbox
stone guard
3rd battery system and associated power delivery
make and fit permanent fridge slide
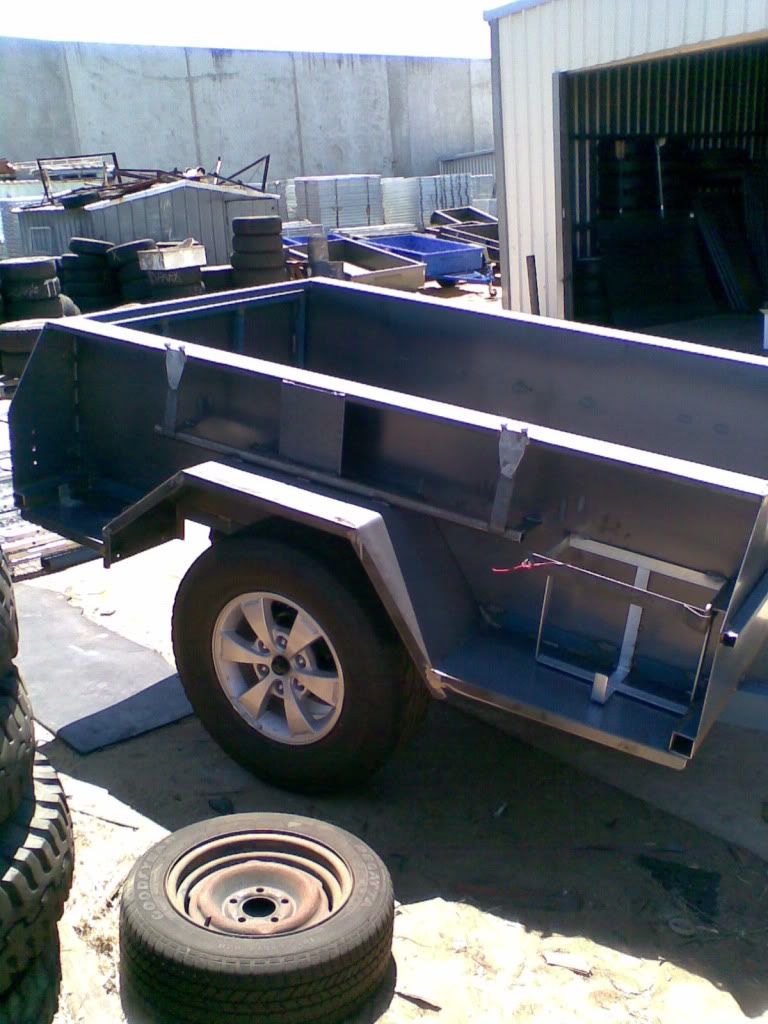
fabrication pics below
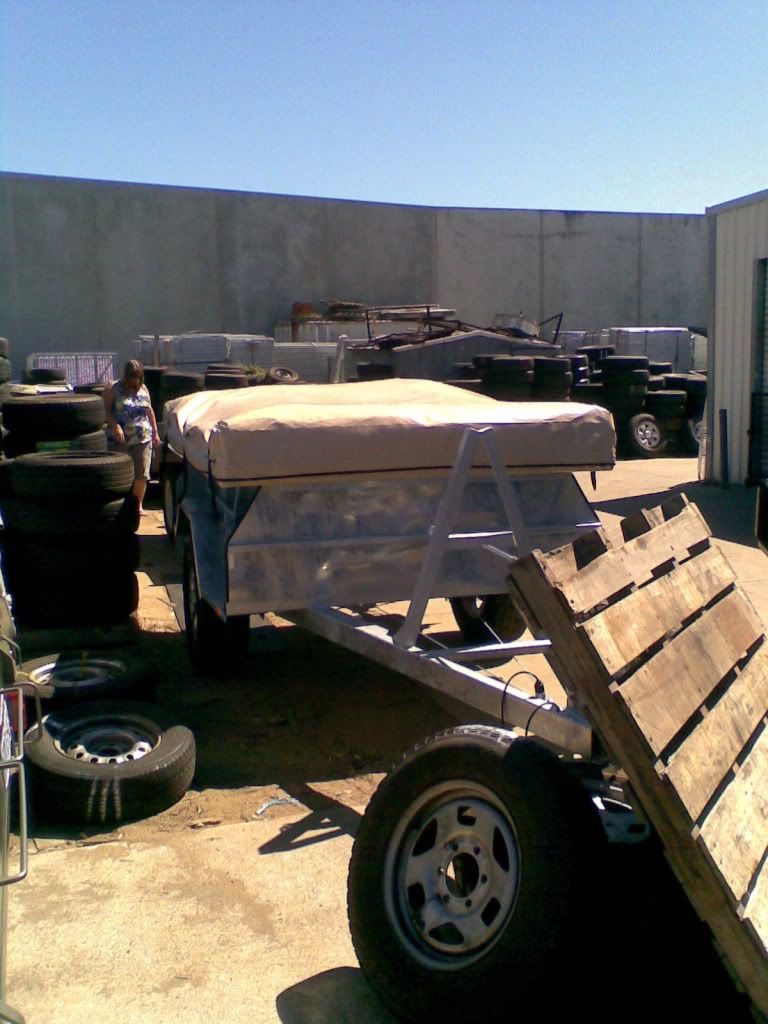
Pre Gal pics:
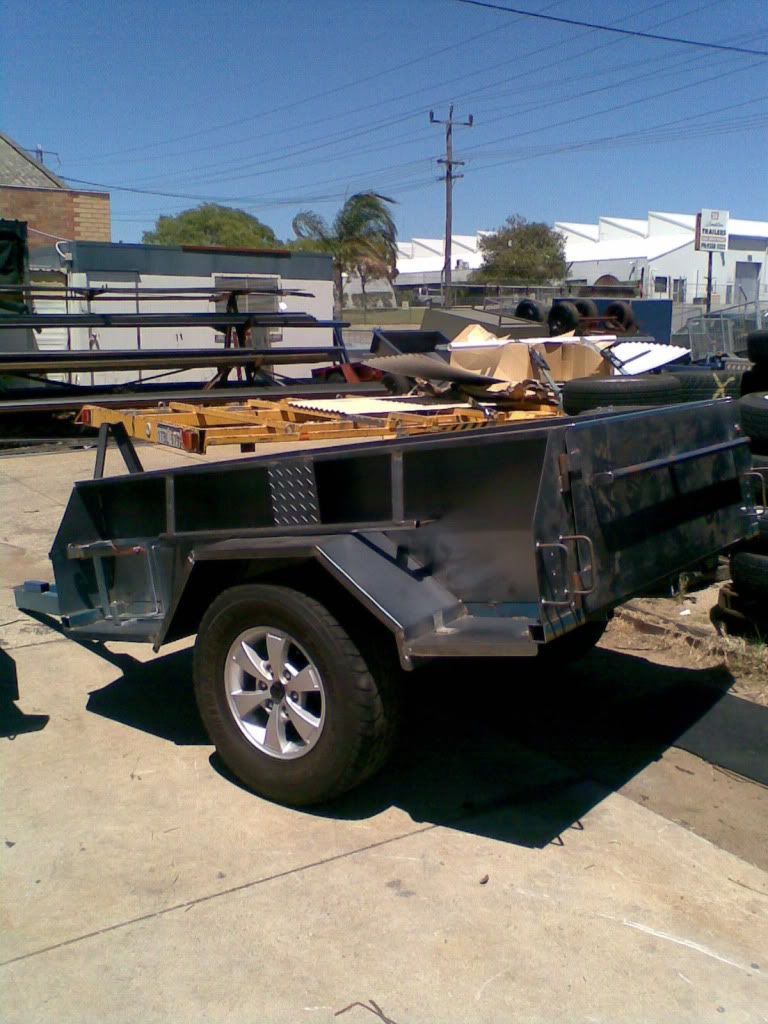

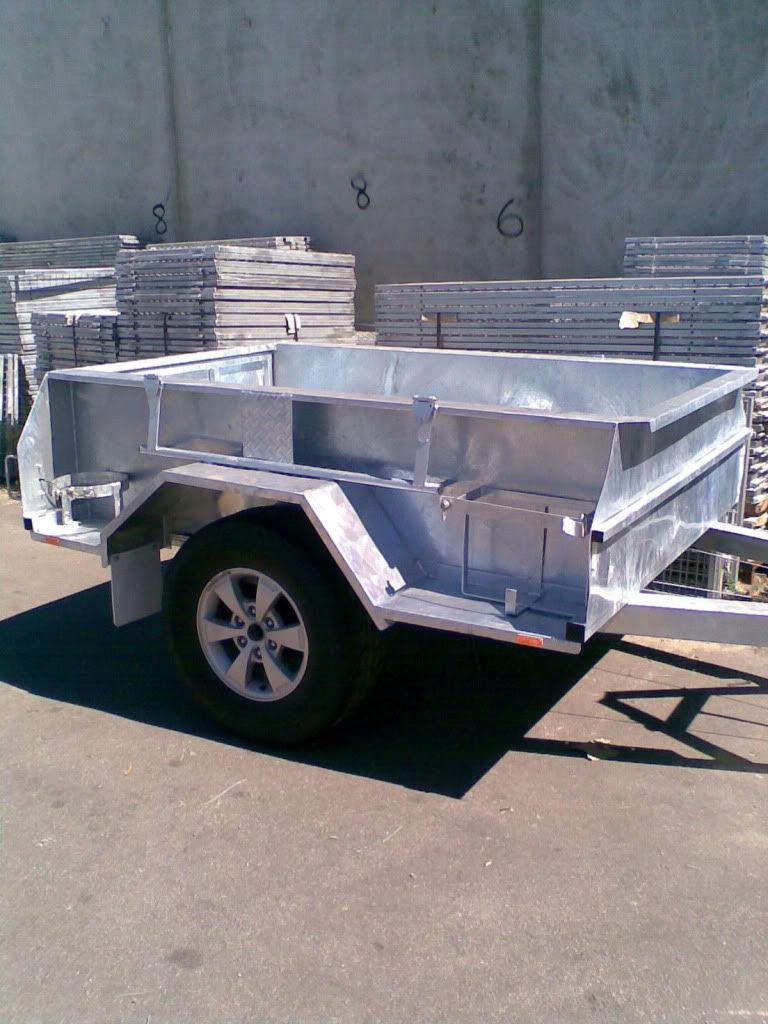
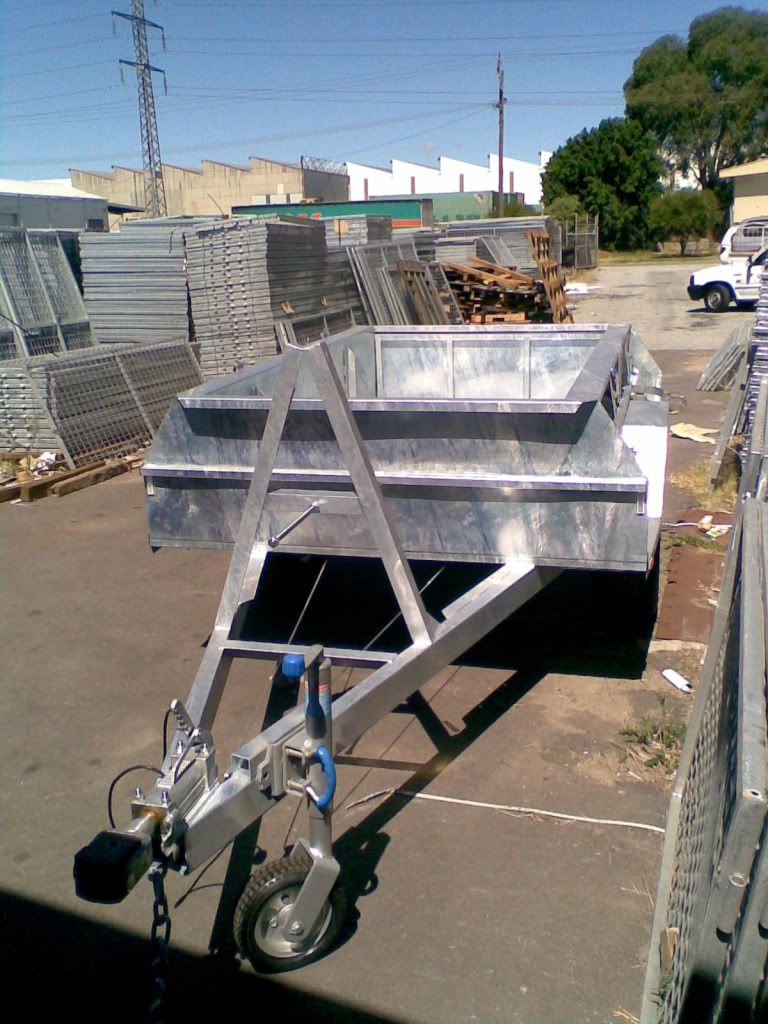
Post Gal pics:

***********************************************************************************************************************************
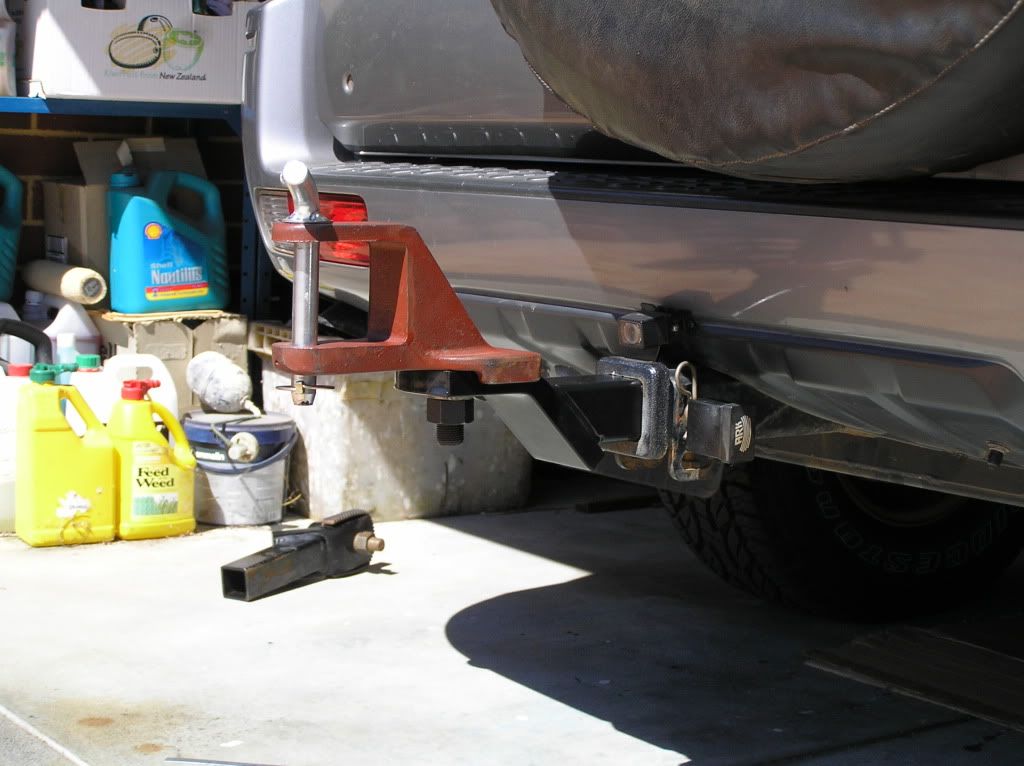
I measured up the trailer hitch yesterday. Ground height is 550mm to the bottom of the poly block unloaded weight without tent top installed. I thought the trailer looked high
Played around with my current tongue and hitch receiver. Turns out if I use the same tongue inverted I get around 530mm. This will be ideal once the trailer has drooped due to load.
Up to the local towbar place, purchased the same (saves me swapping balls/recievers and inverting everytime I change trailers). I got one 50mm longer in length to extend the handbrake lever further from the opened read door of the paj.
All looks well on paper. Yet to attach the trailer.
Pic of inverted tongue, Trigg attached:
hitch with door opened.

***********************************************************************************************************************************
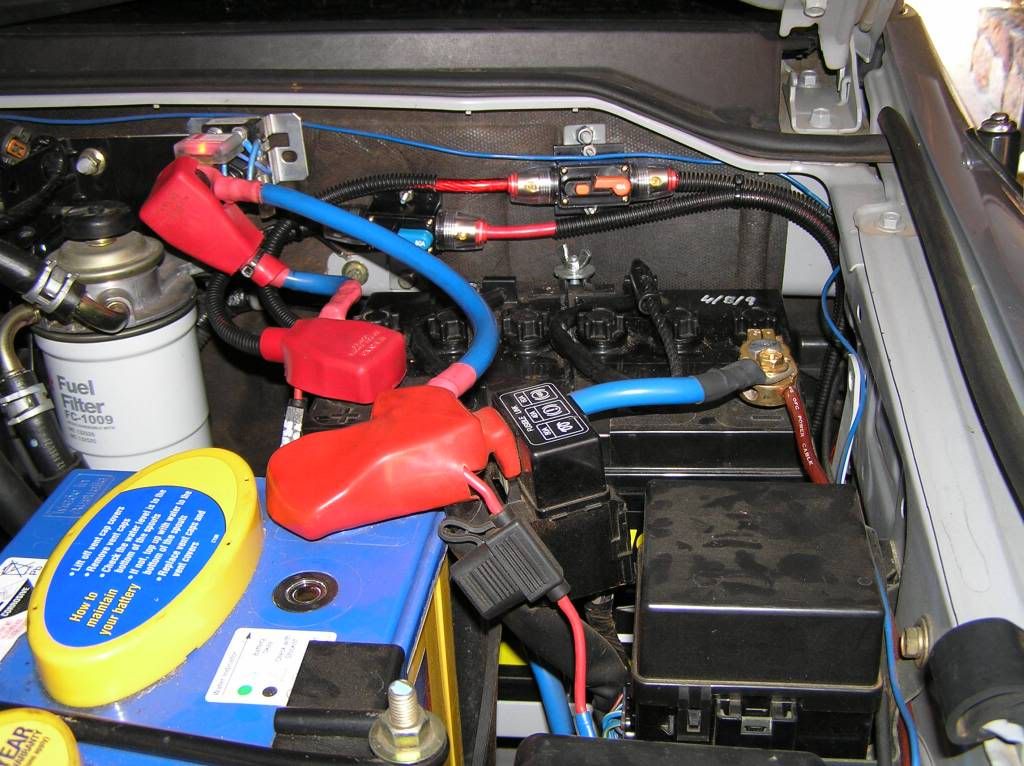
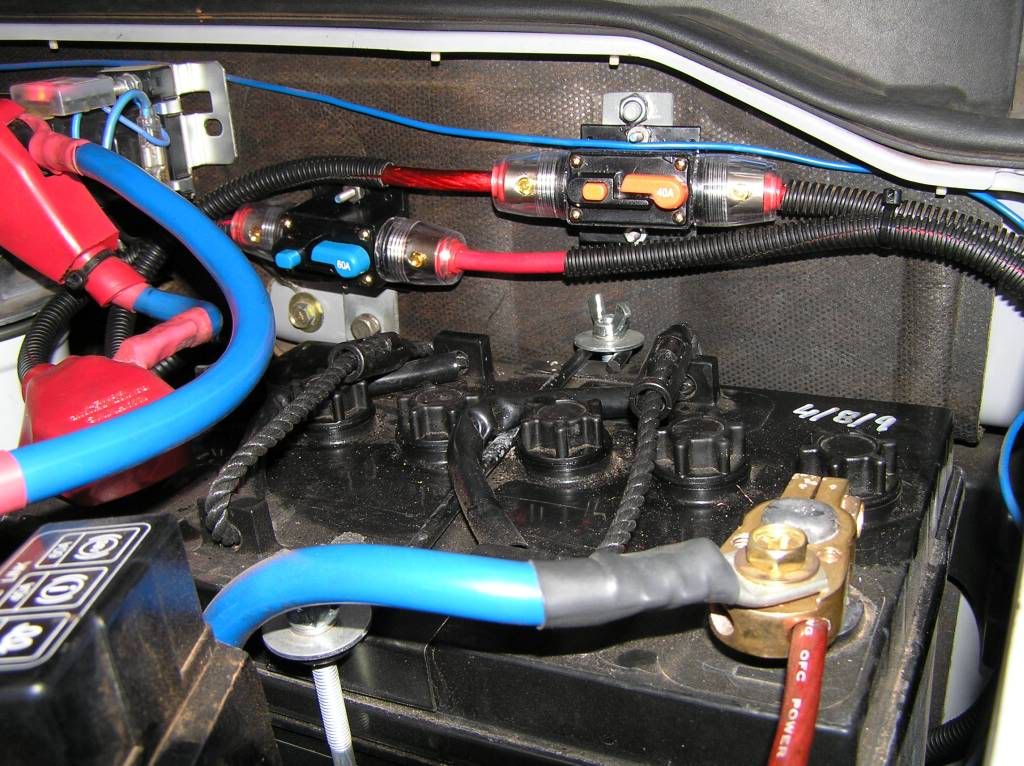
Dual resettable breakers from the aux battery now complete.
40A to rear internal power distribution
60A to external anderson plug at the rear to provide camper battery charging.
***********************************************************************************************************************************
D-day is getting closer, end of next week by any luck.
***********************************************************************************************************************************
Its home and its fit out time


***********************************************************************************************************************************
Dan said " Sits nice and level on the back of the Paj too..... "
There's a trick to that. I bought a dedicated tongue especially so it sat at the right height;)
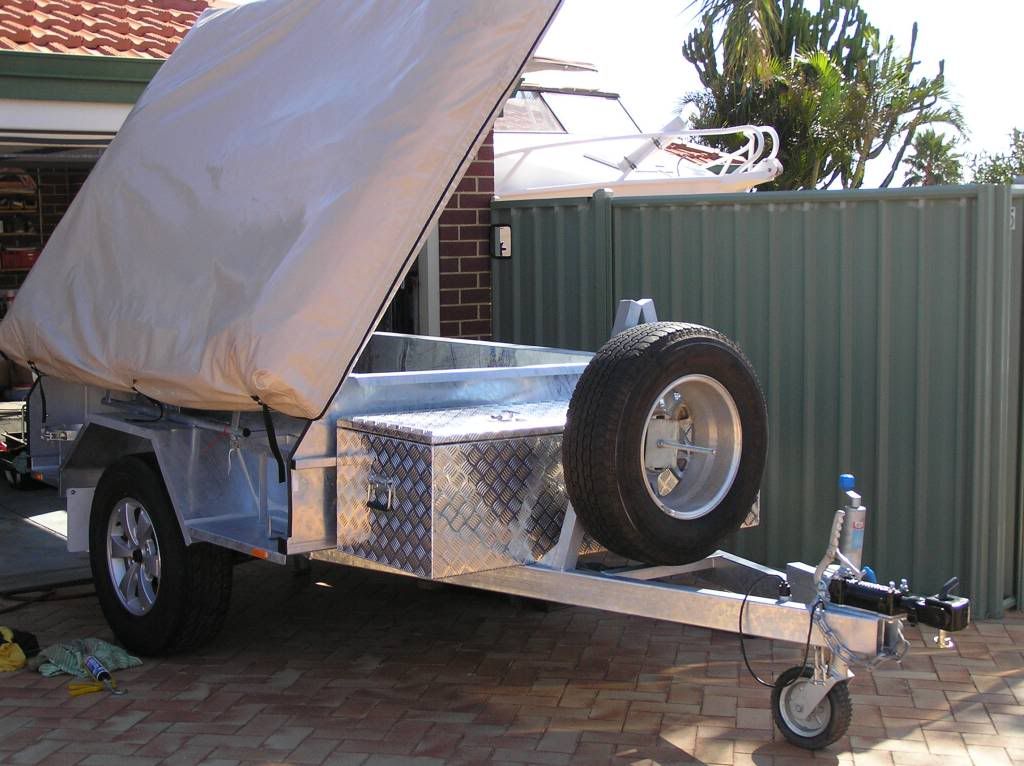
Sealed the unit this arvo.
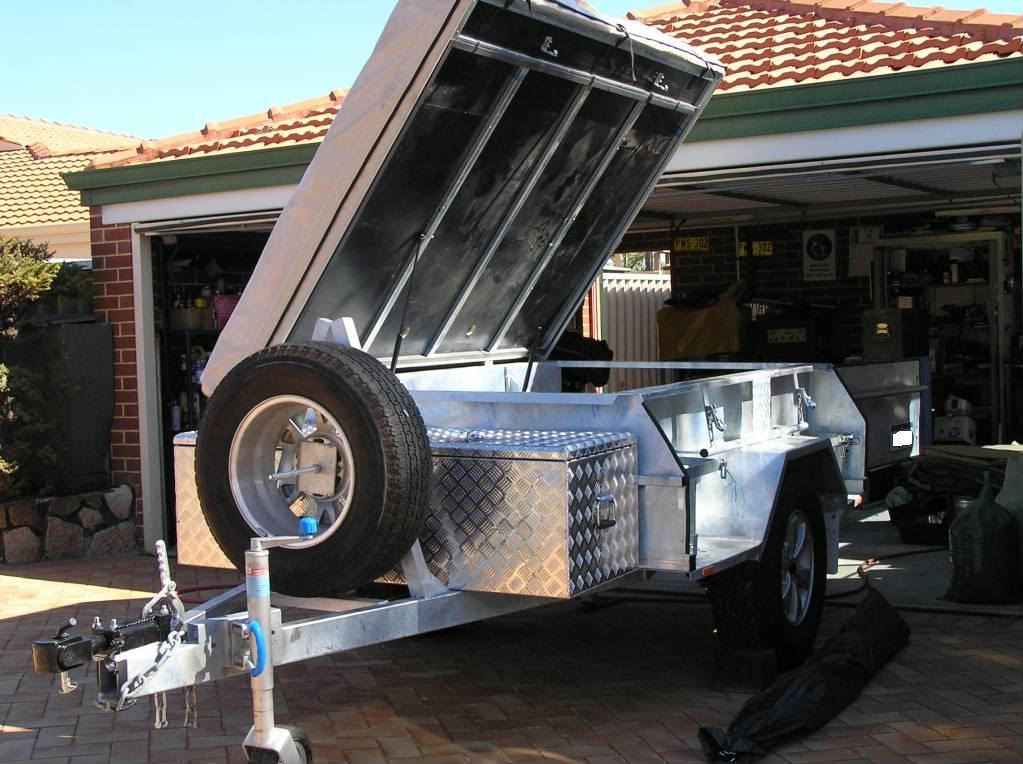
A few more with the lid up and the spare and toolbox sitting in place.
Tent grand opening on the weekend!
***********************************************************************************************************************************
Tent went up today. Couple of cycles of wetting and drying to swell/seal the stitching.
Unfortunately, I have a leak :(
water is wicking thru a seam where a pole rub sheet is stitched into the roof.
I had some dryzabone treatment (yep, the riding coat stuff) for years, decided to paint all the seams with the stuff. Then for good measure I hit it with a silicone based canvas waterproof agent. Time will tell if it solves the problem or not. But apart from that, all seems well.
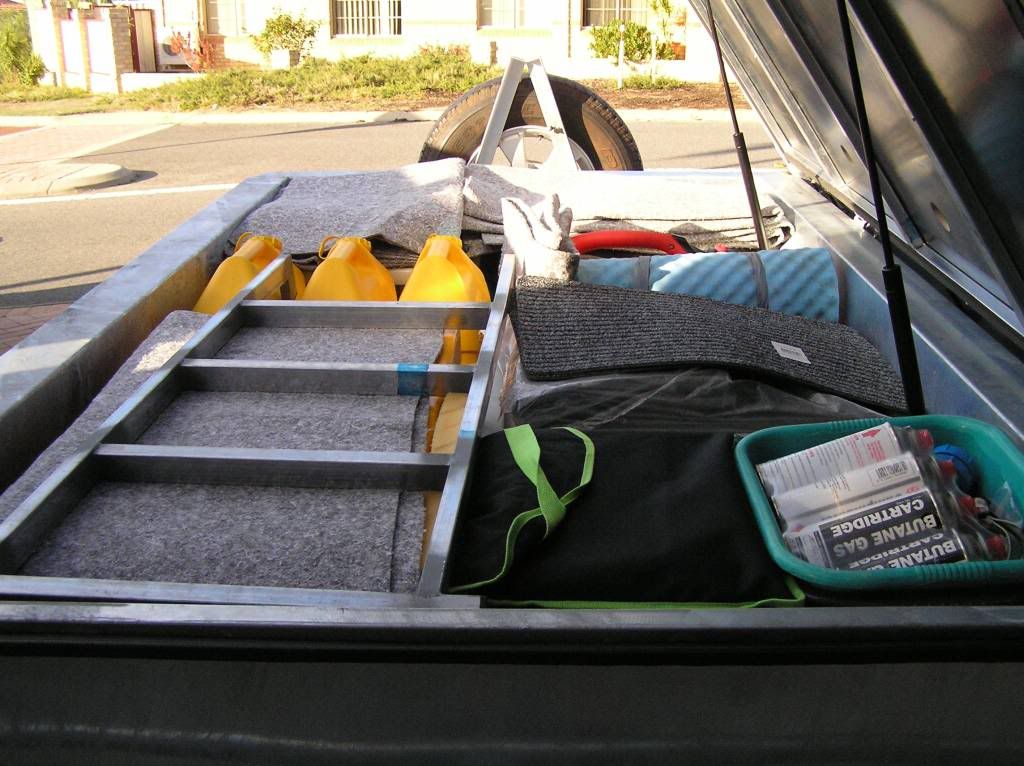
I have this issue with annex poles. Where to put them?
The shorter ones can live in the toolbox, but I really wanted the long ones out of the trailer. So I have stored them under the mattress on one side. See how this goes. Oh yeah, not that I know what I'm doing yet, but a big tent is a PITA to put up and take down. Practice makes perfect I hope.
***********************************************************************************************************************************
Locks, man I need heaps to secure external stuff and the trailer itself. I don't want to carry a hundred million keys. So today I purchased cheap combination cable locks for the spare and external jerries/gas. I will look at 4 x common key padlocks to secure the trailer internals and Al's suggestion of hitch lock.
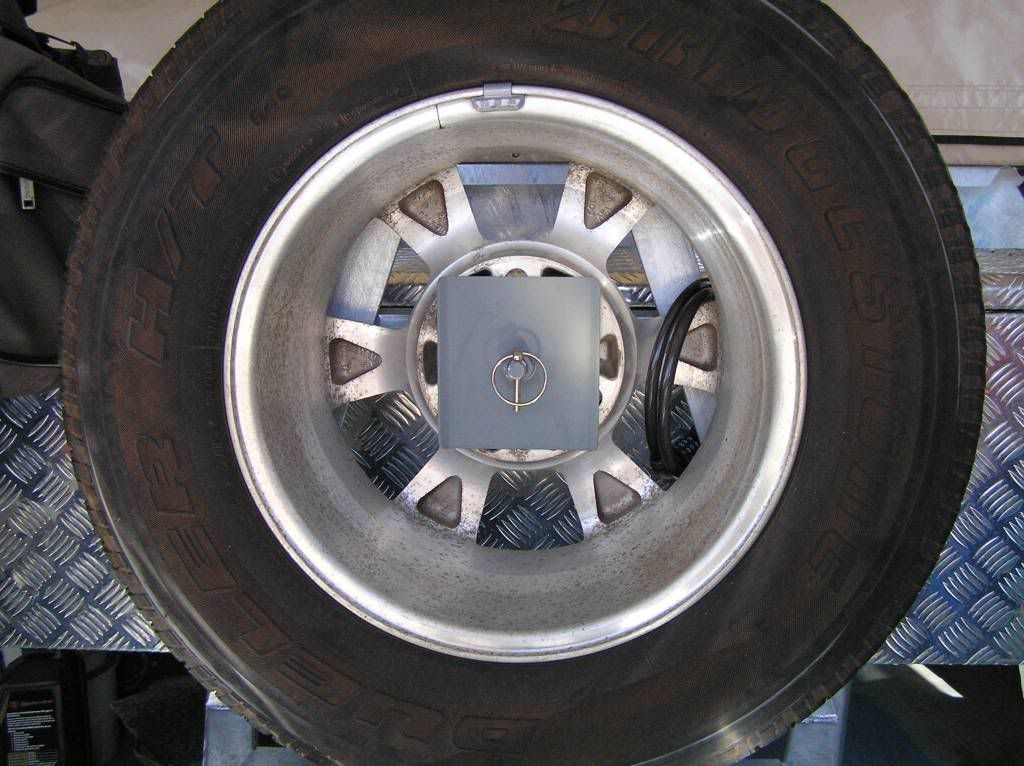
I wasn't happy with the idea of a nut and spring washer retaining the spare in place. I simply drilled a hole in front of the nut and placed a lynch pin there as a safety backup to retain the nut in the event of corrugations working the nut loose only to find my spare ended up in the scrub somewhere without my knowledge. Don't laugh, this is a frequent occurrence.
***********************************************************************************************************************************
The trailer might have been (relatively) cheap, but the fitout is purging the bank balance;)
Also a new waeco 25 to review tomorrow with any luck. Give the poor old evakool a well deserved rest for a bit.
***********************************************************************************************************************************
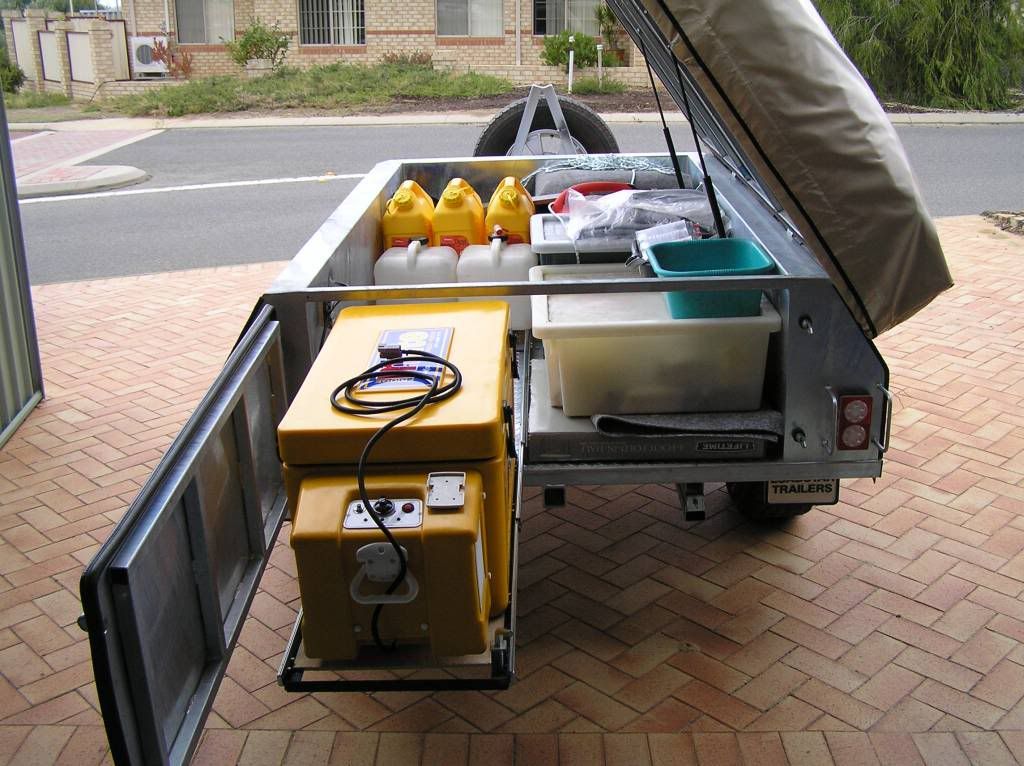
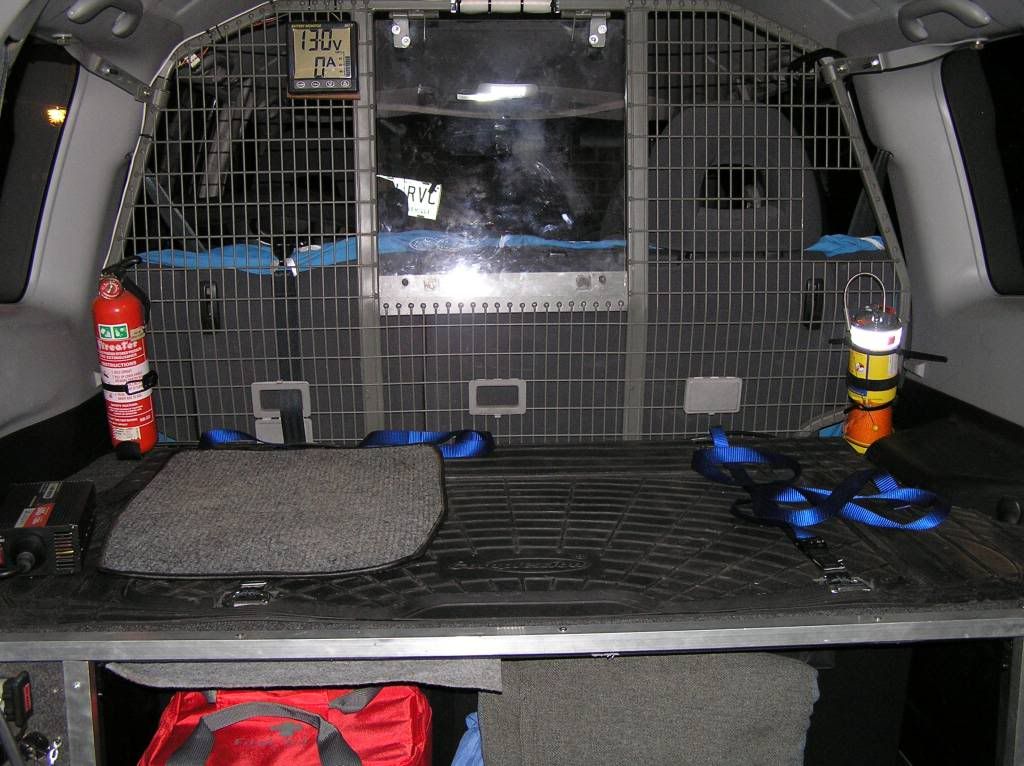
3rd bat system is now installed.
130a/h d/c connected via anderson to vehicle for charging via 6 b+s wire with a 60 amp manual breaker so I can kill the power to the plug when not in use. From the battery into a 40 amp resettable breaker then onto a 6 position fuse box. The fridge power line is non switchable (apart from the 40a breaker). The external sockets are (2 x cig), internal sockets are (1 x merrit, 1 x cig) and I also fitted a led strip light to the lid of the box. The fridge powerline is not inside the trailer as yet, I need to research a triple slide to allow a 1200mm extention for the evakool.


***********************************************************************************************************************************
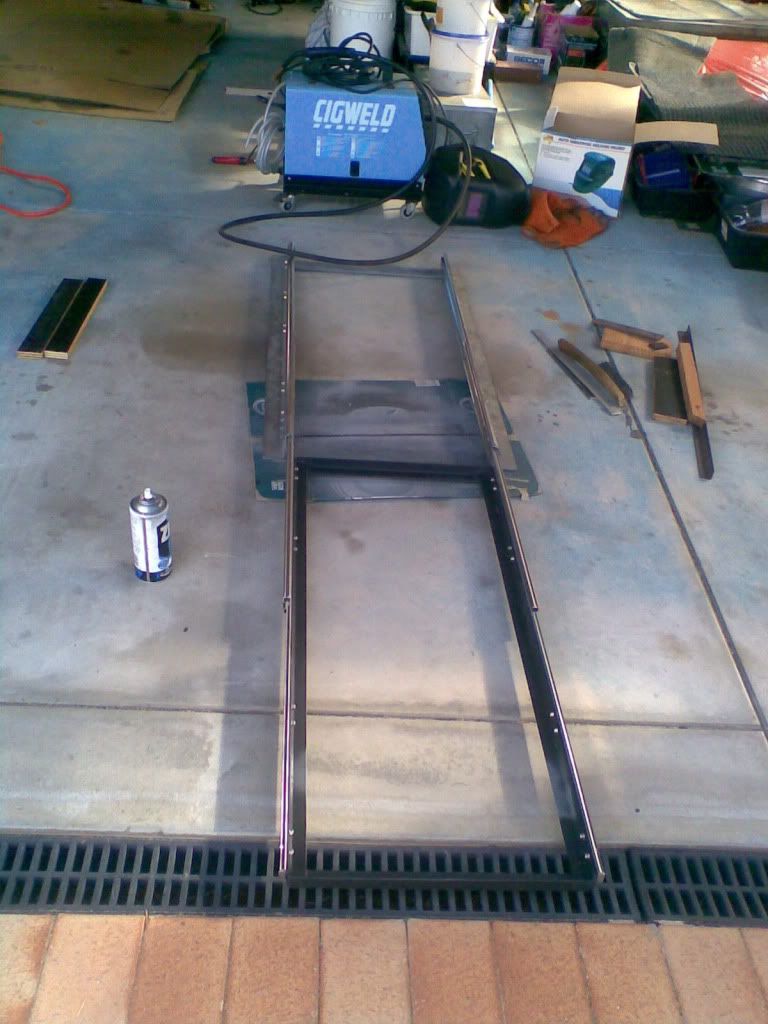
Evakool slider now in progress. 125kg rated telescopic slide x 1000mm. With a little modding, I have just greater than 1000mm extention, perfect for the evakool (its a long little sucker). With fasteners, all up cost has been $150. I had the framework steel on hand, and was given the 50x5 angle base for the frame:)
***********************************************************************************************************************************
Slide mounted, power connected, fridge installed except for the tie down kit.

***********************************************************************************************************************************
I'm getting real close to need to get away I tell ya.
Weigh bridged the car and trailer today. The trailer wasn't surprising at 990Kgs (no water, food or gas onboard, but there was 60L of diesel).
Its Full:
More alarming was the Paj @ 2.62T, vehicle was empty except for myself and a full load of fuel (150L). Wouldn't have thought it would be that high unladen.
Just need to get away to do a trial run
***********************************************************************************************************************************
Nearly done now:

***********************************************************************************************************************************
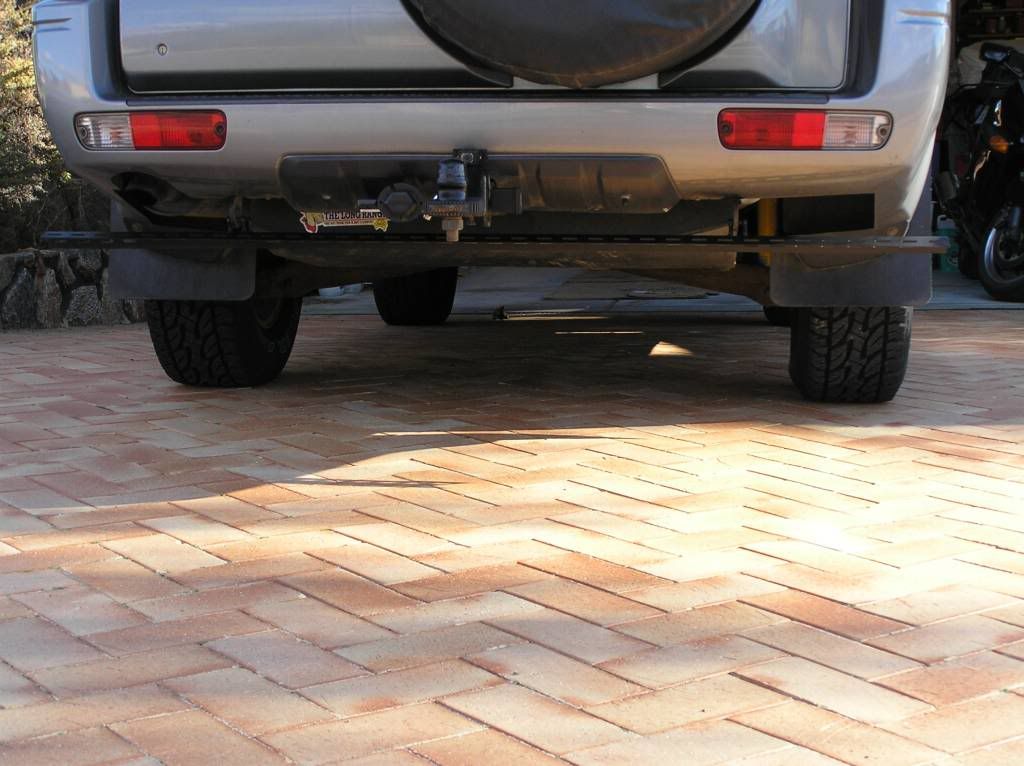
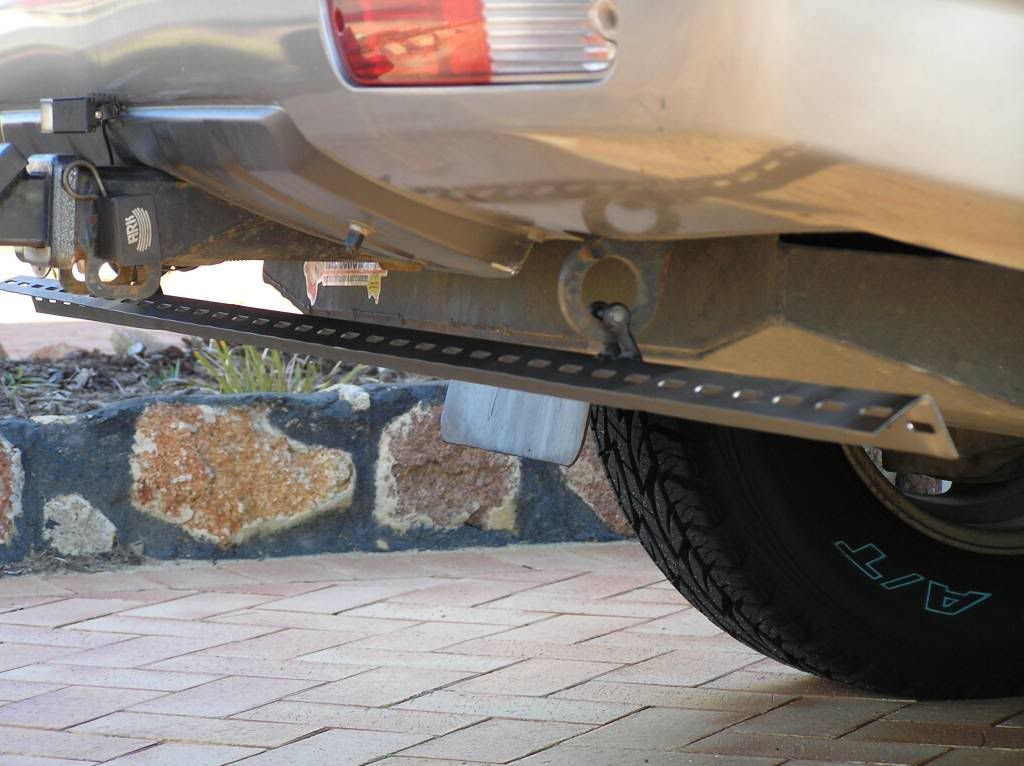
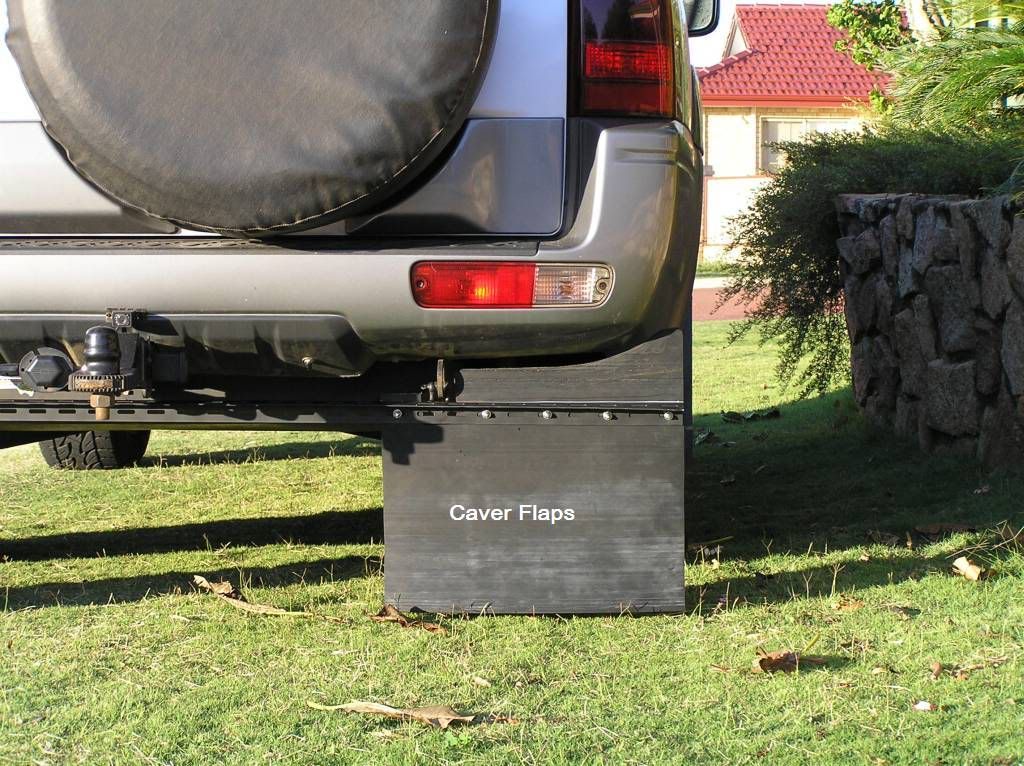
Thanks to Peter's post last week, you solved a problem for me. I had been thinking of using the "tie down" loops to mount stone protection of some description and design and your d-shackle idea was just the trick. 1 x 1.8m slotted angle and 2 shackles later, I just need to mount rubber flaps and I will feel pretty well protected. It is P%SS easy to install and remove. However it will affect departure angle a little. Anyhow if it gets destroyed, its not a big hole in the wallet to replace.
So I introduce to the world the start of my "Caver Flaps" :)
***********************************************************************************************************************************
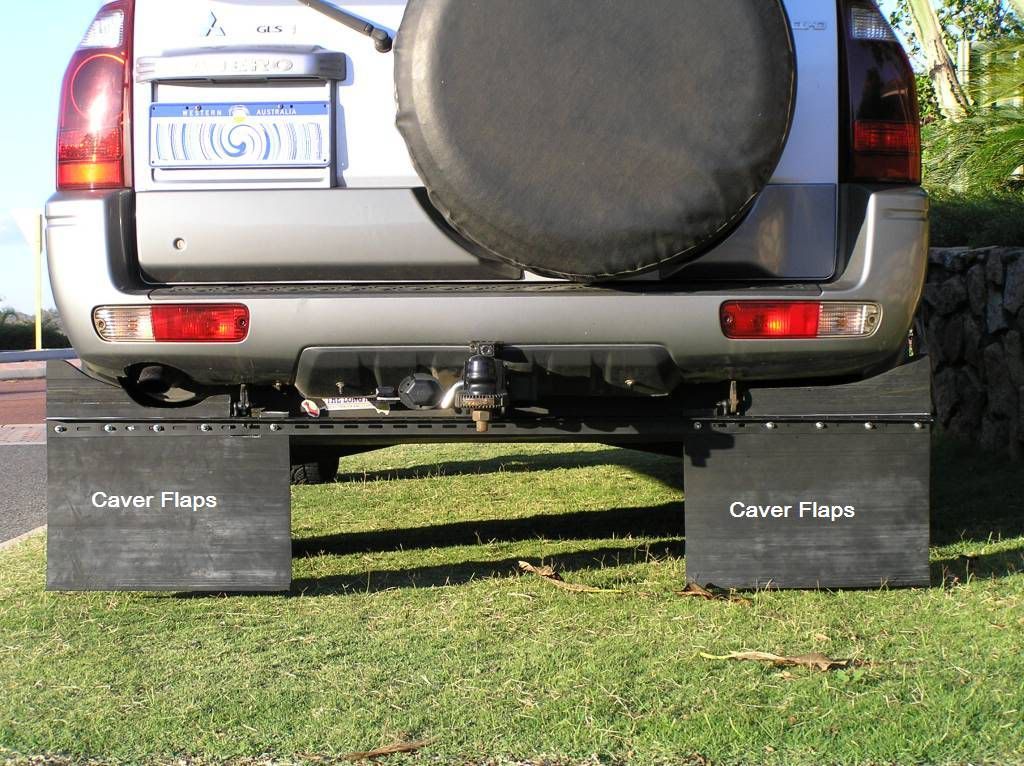
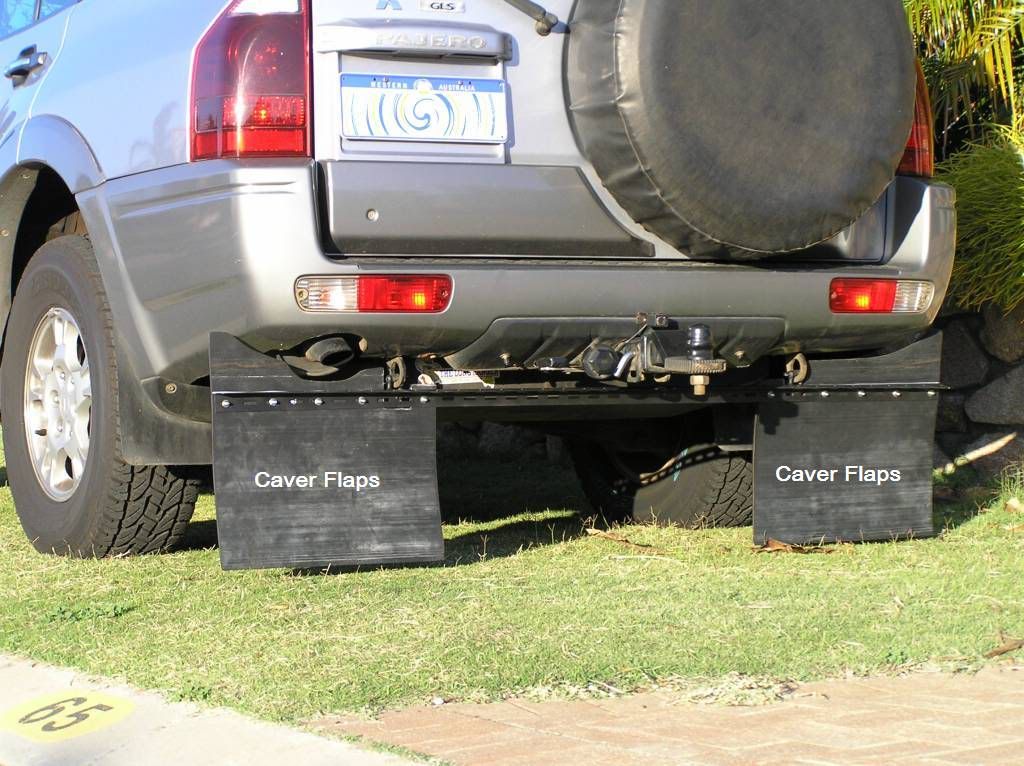
Well I just sourced some 12mm 3 ply belt rubber for $20. Pickup tomorrow and will fit on Sunday. So all up my "caver flaps" will have cost me $45 + some screws/nuts, will be a bargain if it works
Just need to trim the length, $50 + a couple of hours labour....
***********************************************************************************************************************************
Angry said "Dont patent this till I copy it first !!"
I wont till I try them out first anyway
Dan said "Perhaps you should start manufacturing them?"
as above. Or I'll sell you a set in the NT...$150 and those ones will be sand blasted
They're not the worlds best, but they are $400 cheaper than tamers. May need a bit of fine tuning but I can live with that.
And I have read of the issues with exhausts and tamers....more expense!
Unfortunately after grinding the rubber profile with a flap brush and die grinder, my garage now smells like a third world country franga factory..
Again, thanks for the comments
***********************************************************************************************************************************
Update from CT's maiden voyage.....I dont think the flaps are working. You want to see the stones my trailer has collected. Not sure if they are coming in from the sides or underneath, but they need some work.
But more alarmingly, 20Km of slightly corrugated dirt road produced this result. Found it when I got home. Time for some heavy modding rework, better be at their expense.


As for the galv process.....The failure here I believe is due to embritlement from the weld not the galv. The RHS hasn't coped with an upward bounce and has sheared due embritlement. This could be helped by preheating before fab. The galv process is a lot lower in temp and would have annealed the tube making it less prone to the shear shown. I think I willl be asking for a full plate cap, sides and bottom on all 4 mounts on the 4 springs. I'm suspecting the RHS is 1.6 in thickness. This may be a bit light. Having said all that, it has only done 20K's on the gravel. There was a few corrugations, but nothing extreme. As you could imagine, when found I was a bit disheartened I thought it had the goods to last. God only knows what would have been the case if this happened on the GRR in about 6 weeks time
***********************************************************************************************************************************
Well its back at the manufacturer now. They were surprised, they had never seen a rear mount do that, but had seen fronts move hence why they brace that part. I mentioned 1.6 rhs was maybe too small, they assured me it was 3.2. Then they gave me crap about using rhs over 5mm angle and slippers which they prefer to use. They also believe the hanger may not have been moving. I think i will weld a spacer strap on the hanger to stop the compression on the mount from torquing up the shackle pin nut. Anyhow I too agree the mount is probably too small in surface area and the whole area needs to be braced. See what they come up with. All other chassis welds are fine.
Now I need to do another trial run, this time I'll be giving it curry down as many corrugations as I can find. On another note, I was pleasantly surprised at my economy. Came in as normal to around town driving. 370Km's used 39L or 10.5l/100. Gotta be happy with that. This was about 100K's of 100km/h highway, 50K's of very hilly terrain and the remainder 80K roads and gravel each way.
Now I need to do another trial run, this time I'll be giving it curry down as many corrugations as I can find. On another note, I was pleasantly surprised at my economy. Came in as normal to around town driving. 370Km's used 39L or 10.5l/100. Gotta be happy with that. This was about 100K's of 100km/h highway, 50K's of very hilly terrain and the remainder 80K roads and gravel each way.
***********************************************************************************************************************************
Picked up the modded trailer last Sunday. But I've been on lates since and had no time to look at it. They have now placed the perch block on 6" of 50 x 5 angle, fully welded to the rhs. This should solve the collapsing rhs issue by spreading the load.
I have done quite a bit of investigation into this even with the spring manufacturer. It is my belief the hanger pin bolts were torqued too much, thus not allowing the hangers to move. This in turn has caused fatigue cracking in the rhs. Once the rhs developed the crack, then the problem accentuated due to the non moving hangers and peeled the rhs back as per the pics.
The trailer manufacturer's intital comment was " I told you not to use RHS and I told you to use slippers" I countered this by saying its an offroad trailer for christ's sake. You use only use RHS and double eye leafs for this..... There goes another argument for "local box trailer manufacturers"......Anyway it turns out they crank the nylocs hard cause they have had issues in the past with nuts rattling lose... so there is my problem and solution.
I will counter this loose nut syndrome. I purchased castlated nuts during the week as I found my pins are drilled. So I will remove the nylocs and split pin or lock wire the nuts without them having too much tension on the moving parts. Loose nuts problem should be solvered. I have this weekend off and would have loved to have given it another "trial" but alas its not to be. I will instead mod the trailer and part pack the car. BTW, my initial caver flaps didn't seem to work so I made bigger flaps...cant have em too big now...I may do a solo jaunt mid next week (my last break before heading north).
***********************************************************************************************************************************
Vac packed 3 weeks of meat today + the trouble and strife has been doing a splendid job in the catering dept even if she failed elsewhere (I have been on nights!). I will have 3 weeks of food onboard to minimise the shopping. The closer I get, the more I need to have a beer (or red woobler) and feed and chat with you and yours + kids somewhere in the NT.
***********************************************************************************************************************************
I've been having big buy ups for months now, my ebay rating has skyrocketed and I just hope I can afford the fuel bill coming. Latest acquisitions: a hillbilly hot plate for use on both campfire and gas stove and some ali pans with removable handles. Also went with an ebay MSA rear tyre rubbish bag. Would have gone for the infront canvas gear but they have been away till this week and I had to have something ready for the trip. Another tip...carting your oils. I'm not happy carting an oil change in oem oil bottles on the country I'm about to traverse. So I purchased 2 x 5L plastic jerry's to hold this. I think I'm going to call this trip the Malcolm Douglas memorial tour, after all he nearly run over my boat mooring ropes on my last Kimberley adventure. Anyway enough bourbon induced wafflings from me for now and I hope it gives you some insight to where I sit at present. Catch ya in the NT....Yeah!
***********************************************************************************************************************************
3 weeks of meat now all vac'd and frozen. Spose I could always "gather" my own meat for the next 3 weeks but in the spirit of croc dundee where dundee doesn't eat Linda's goanna by the cazmpfire...Not eating that, tastes like S*%T, then opens a can of beans Not happy with the right hand spring. Fitting the castleated nuts, I notice the spring has a slight twist to it, the hanger bars are not vertical but slightly cocked. Anyhow, took it for a 10K dirt run today almost fully loaded. Tried to bounce the heck out of it and got to plough it through some soft sand too. Whilst I dont like the twist, all appears to have gone ok. I might go do a solo over nighter on Wednesday to give it a harder run. That's the issue, once you have a drama, you lose confidence in its ability. Oh well, only time and distance will tell. Spose I could always take the mig seeing as I have a 3.4KVa genny onboard Started packing the car spares, first aid kit and bits today. Not long to go

***********************************************************************************************************************************
Also fitted my extinguisher and eprib in the rear
I found some releasable cable ties on ebay, quality seems ok, be interesting to see how they perform. Great for tying the "shit shovel" to the side of the trailer
MSA rear tyre rubbish bag on way. Think I'm almost geared out
***********************************************************************************************************************************
Gave the trailer a fair trial over the last 2 days and at this point its all systems go. Before you call me soft like someone else did.....I tented it overnight as we had rain and I have no more days off to dry things off before I go catch up with Dan for a beer in the NT. Again, I got blocked down a trail by a big fallen jarrah...and had to reverse out. Also kept awake most the night by the local alumina producer, firstly while they set off a huge amount of charges, secondly by the earth moving equipment that ran all night. But apart form everything being wet, all's good.


***********************************************************************************************************************************
Dan said: "Can't blame you for not setting up the tent, they are a PITA to dry when you don't have the space to set them up again under cover."
Yeah, well some bloke directly above you called me soft cause I was towing the trailer but taking a tent.
Here's another tip:
Grab a pool noodle , cut to length and place over the handbrake lever of your trailer to help minimise any damage from kids opening your rear door into it! Unfortunately its now winter and noodles are hard to come by
Pic below is much later on than this post, but shows the noodle in place:

Grab a pool noodle , cut to length and place over the handbrake lever of your trailer to help minimise any damage from kids opening your rear door into it! Unfortunately its now winter and noodles are hard to come by
Pic below is much later on than this post, but shows the noodle in place:
***********************************************************************************************************************************
Well, that's all folks. Off to the Pilbara, Kimberley and NT in the Caver Trailer with new improved caver flaps!
See ya in 6 weeks
See ya in 6 weeks
***********************************************************************************************************************************
yeah, but with hard labour....couldn't be bothered pulling the buried recovery gear out so used the old abseil rope ;)
And he was a south Aussie, too bloody close to a Victorian for my liking :) so it was hard labour indeed
***********************************************************************************************************************************
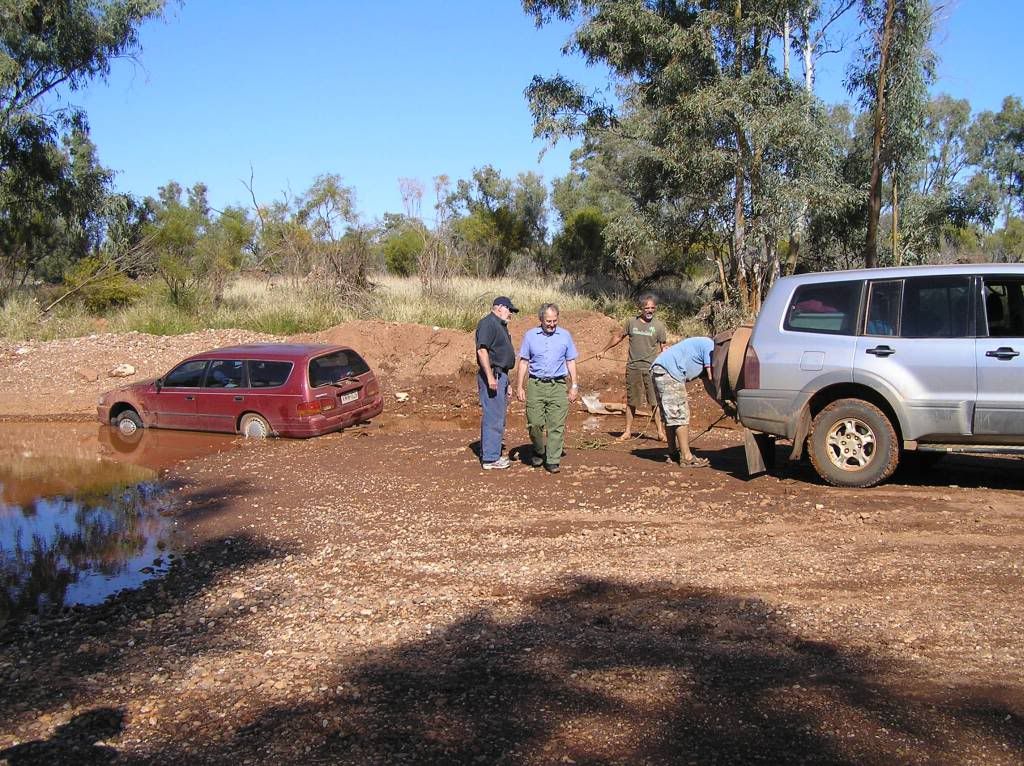
Wayne said: "What were they thinking"
That driving around the edge was going to be easier than going thru the guts.....
WRONG.
Pulled it out and he drove straight thru the guts..... Piece of piss
***********************************************************************************************************************************
***********************************************************************************************************************************
Trailer went ok, no major drama's. A few minor issues I'll post in my trip thread. The car fared much worse. Looks like I've a hole in the Aux tank somewhere. It must be on the top of the tank, due to the exhaust I cant see the LHS so it will have to come out. That's a day job just to remove as all the rear storage will have to come out first. I suspect the rear seat well ribs have rubbed a hole in the top or cracked a weld. It had no impact (apart from being stone blasted), maybe the 3000Km's of corrugations got it. I noticed it after the spring creek track into the Bungles. Not too happy bout that, but it happens I guess.
***********************************************************************************************************************************
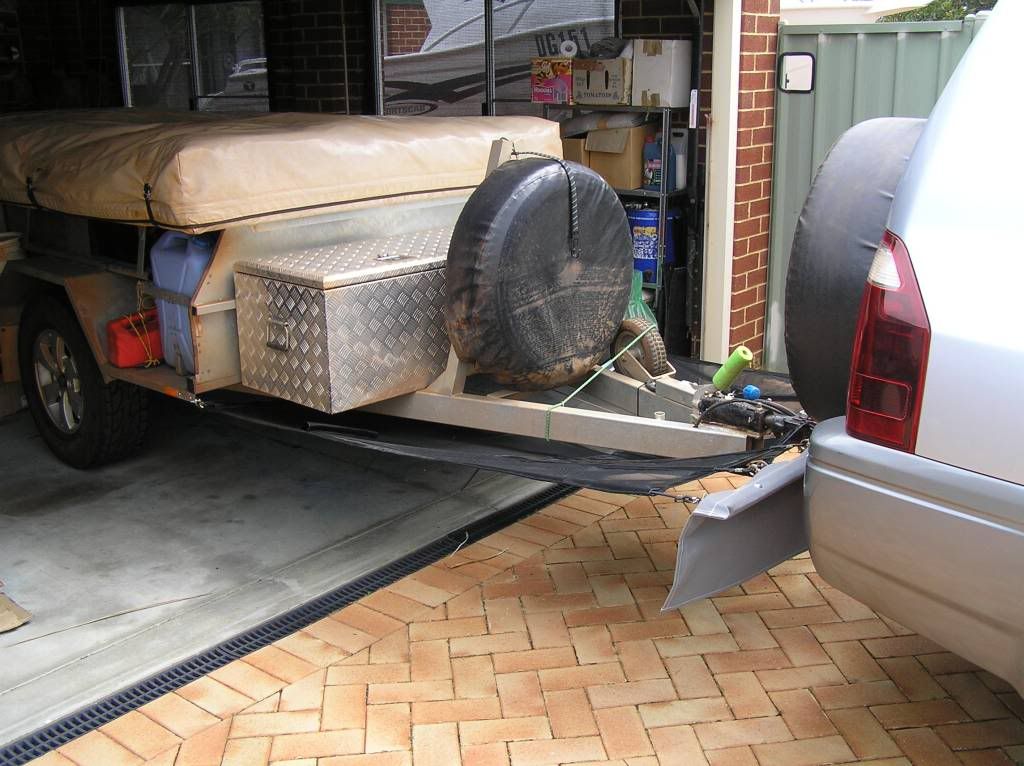
The caver trailer is now with a stone stomper. Not used in anger yet to give an appraisal.

***********************************************************************************************************************************
Dan Said: "That looks tops Shane!
Might have to invest in one for my camper, as it copped a hammering on our trip away.
Do you mind me asking how much it cost to setup? And how does it attach to the car / towbar?"
You dont want to know how much!......No really, I priced a manufactured upright stone shield from local CT manufacturers here and this price of this was the same. Current pricing is $550 custom made to suit your vehicle.
There is a bracket that mounts underneath the trig. To this bolts a crossbar which has the grey canvas flap attached. The trampoline is attached to some brackets you mount on the trailer. The car side of the trampoline has quick release clips that attaches to that bar on the vehicle. Have a look at his site.........
http://www.stonestomper.com.au/
The quality is superb and Christian is very good to deal with.
http://www.stonestomper.com.au/
The quality is superb and Christian is very good to deal with.
The only thing I dont like about it is that it bags a little in the middle. Turning a corner, the mat bunches up and runs the risk of being dragged on the ground. When I get some time, I'll see what can be done to stop the bagging.
Oh and another thing. I ran out of time so I left the bar in place Yesterday. Today I realised no one would have been able to see my indicators. So that could be another downside....you need to remove that bar too if you wish to drive the vehicle away from the camper.
Update Easter 2012:
Seeing as they have come down in price quite a lot if you look around, I now have a set of 120W mono solar panels to help keep the camper battery in check on longer trips away.
Update Easter 2012:
Seeing as they have come down in price quite a lot if you look around, I now have a set of 120W mono solar panels to help keep the camper battery in check on longer trips away.
No comments:
Post a Comment